Skip to content
Potto AI

Product photography: the same product before and after

One product photo and the studio shot generated from it. The result uses the template's fixed 1:1 ratio.

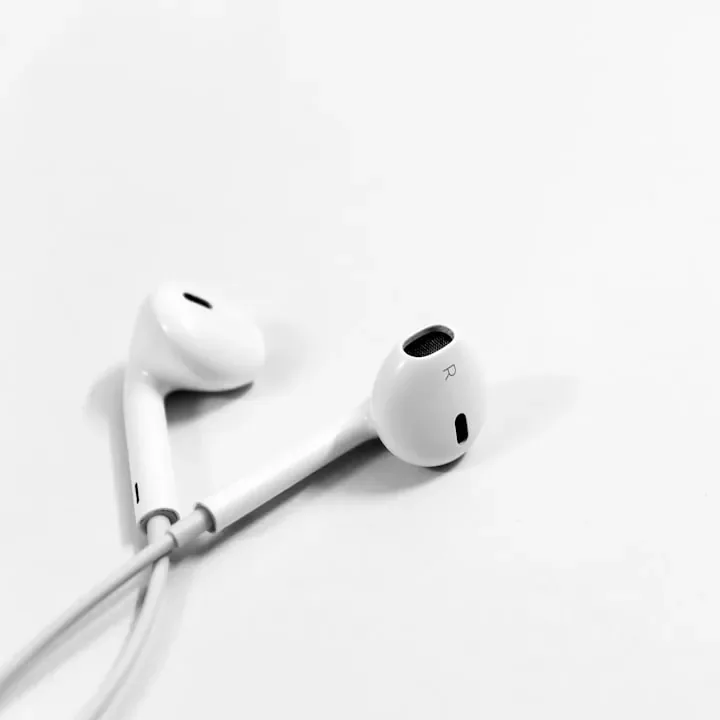
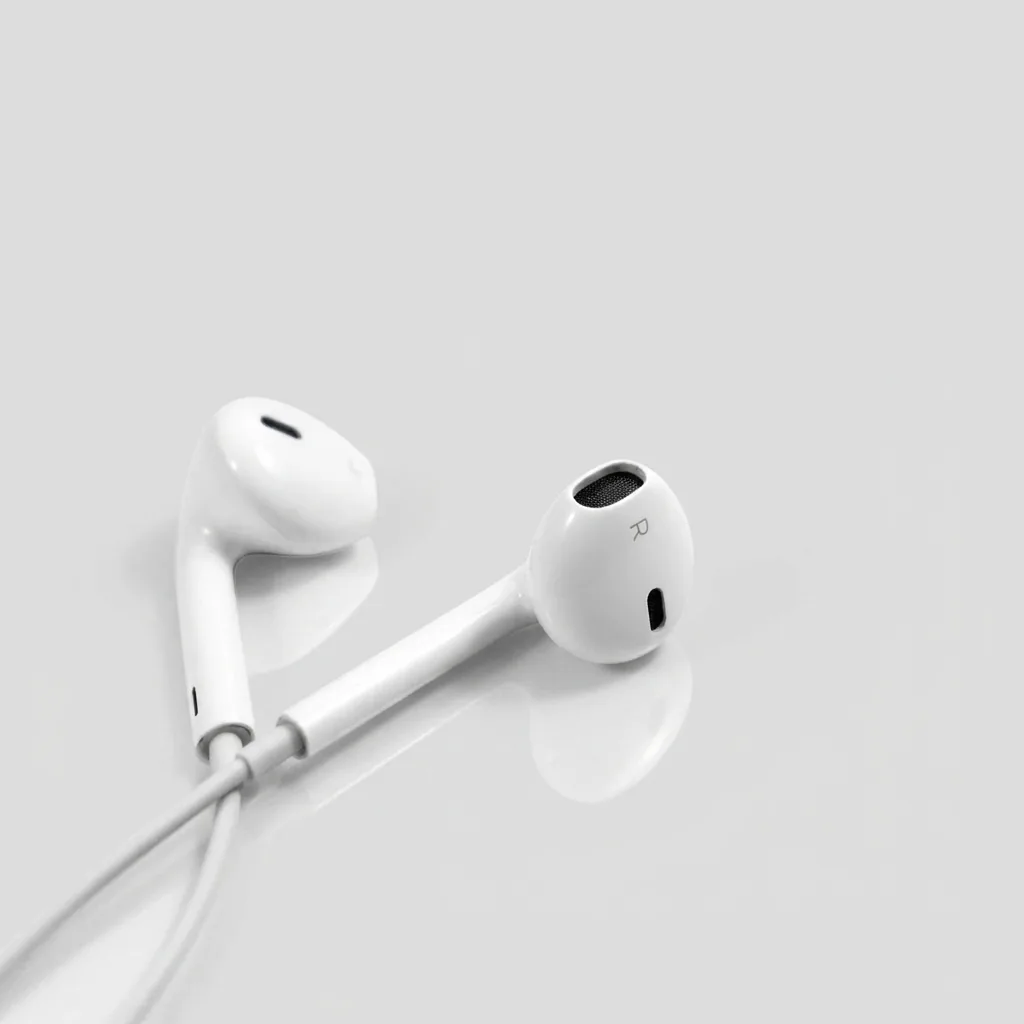
Original photo of white earbuds on a white surface
Original product photo
The same earbuds in a studio shot with a soft grey backdrop and a subtle reflection
Product photography result · 1:1

What stayed

The recipe asks to keep the product's shape, colors, label and details exactly the same. Compare the silhouette, the number of parts, the closure and every word on the label with the real item, not with memory of the packaging.

What changed

The background becomes a soft neutral backdrop with clean soft lighting and a subtle reflection under the product. Surfaces can look smoother or glossier than the real material, so the studio look does not prove the finish.

What to check

Read the label at full size, because a word or a quantity can change while the pack still looks right. Check that the reflection matches the item above it, the base shadow grounds it, and transparent edges were not turned opaque.

Where studio product photography fits

Three common uses of an AI product photo. In each one the accuracy of the product comes before polish.

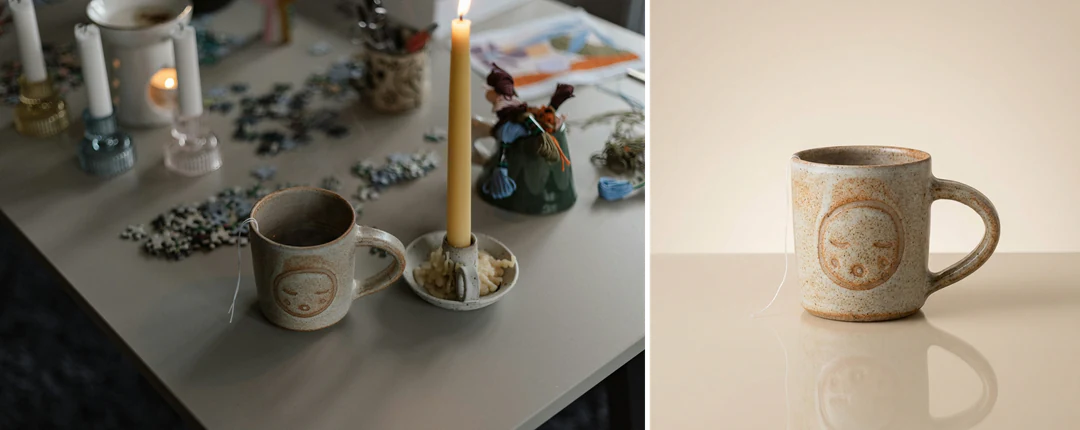
Handmade ceramic cup on a cluttered table beside the same cup in a clean square studio shot

1:1 · Maker

Small maker testing a cleaner look

Start with a real photo of a handmade object, such as a ceramic cup. The studio treatment lets you judge a quieter background and softer light. Compare the outline, handle and glaze pattern with the original: handmade irregularities may be part of the item's identity, and smoothing them can misrepresent what you sell.
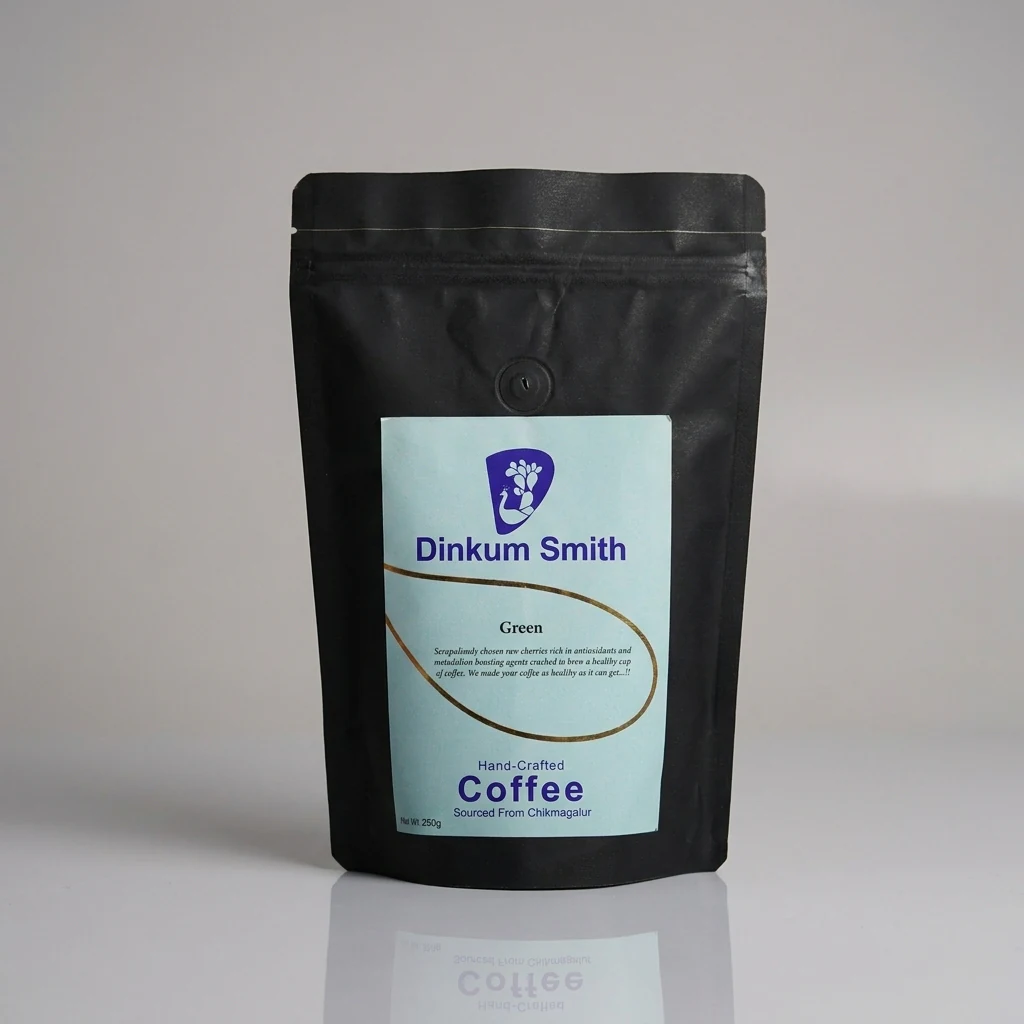
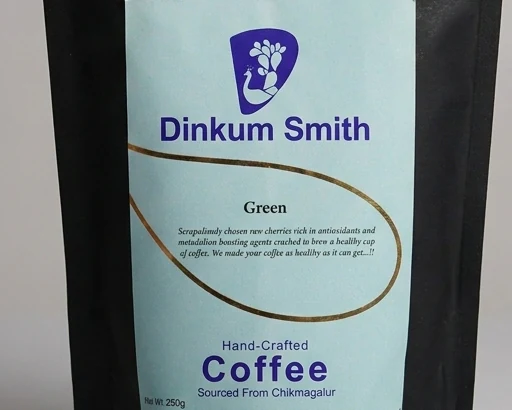
Packaged product in a studio shot with the front label readable at full size

1:1 · Packaging

Packaged product with a readable label

Choose a reference where the front label is already visible, then inspect the brand name, product name, quantity and small marks at full size. Approximate lettering can look convincing from a distance and still say something different. The template is not a label typesetting tool, so keep the real photo when exact wording matters.

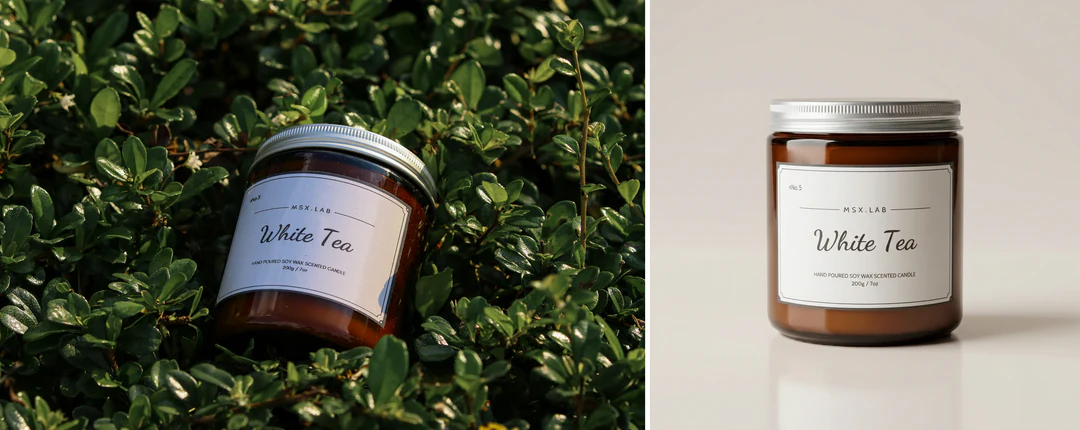
Studio product shot of a candle jar beside the real product photo it was made from

1:1 · Listing review

Early listing or catalog review

Use the result as a presentation direction beside the real product photo, with a short list of details that must stay accurate. The template does not verify product facts or follow any marketplace's image rules. A result that works in a small slide can fail at listing size, so recheck when the destination changes.

How to make a studio product photo

Upload the product, check the fixed output, then compare the label and finish with the real item.

  1. 1. Upload one clear product photo

    Add one JPG, PNG or WebP image up to 20 MB of the exact item, showing the complete product and a readable label. Remove cables, boxes or props that are not part of it, and avoid glare or deep shadow over the label.

  2. 2. Check the fixed settings

    There is no backdrop color, camera, lighting or ratio option; the panel shows the fixed output, one 1:1 PNG at HD from Nano Banana Pro.

  3. 3. Generate and check the product

    Each product photography result costs 45 credits, shown on Generate before you confirm. When the studio shot is done, compare it with the source and your approved product information, check shape, label, parts and finish, then download it.

What the product photography template does to your product shot

Product photography here means turning a photo you already have into an AI product photo with a studio look. Four features cover accuracy, the studio look, the fixed settings and the label check.

  1. 01

    Your product's shape and label stay the reference

    The real item, not the studio look, is the standard. The recipe asks to keep the shape, colors, label and details unchanged, so start from a photo that shows the complete product with a readable label, and judge the result against the item in your hand.

    • One clear photo of the exact item
    • The complete product with a readable label
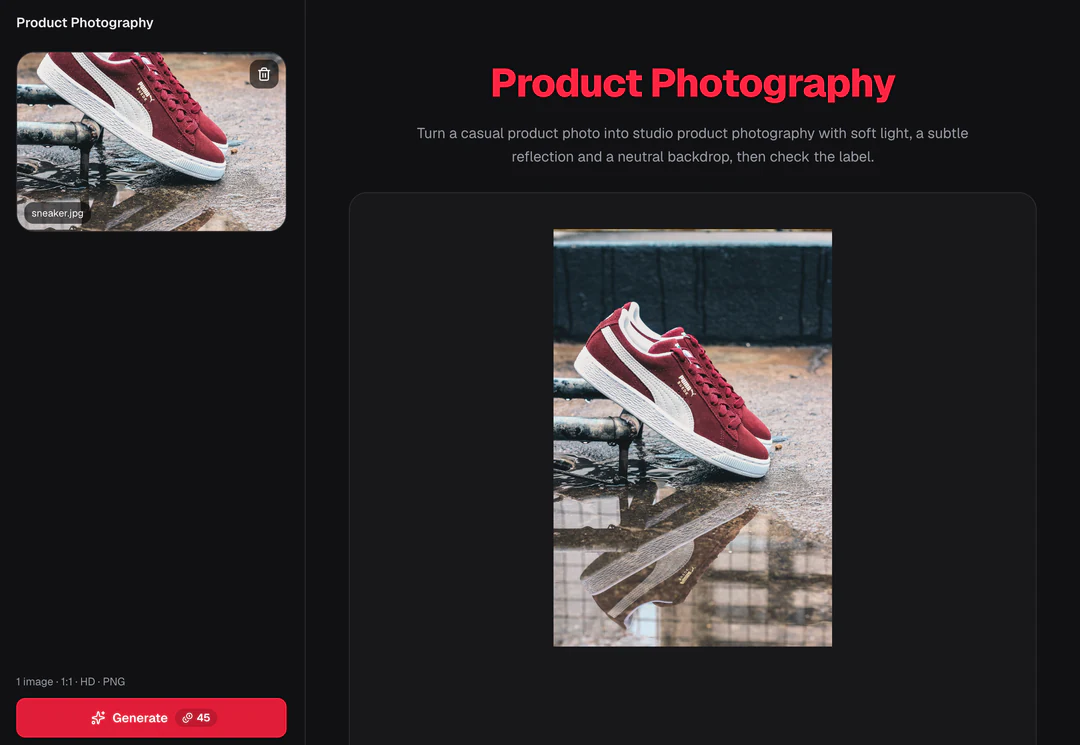
    Original product photo used for the studio treatment
    The original product photo
  2. 02

    Soft light, a neutral backdrop and a subtle reflection

    The casual setting is replaced by a soft neutral backdrop, clean even light and a subtle reflection that grounds the product. The polish is part of the recipe, which also means a matte or handmade surface can come back smoother than it really is.

    • Reflection and shadow ground the item
    • Handmade irregularities may be smoothed
    The product on a soft neutral backdrop with clean studio lighting and a subtle reflection
    Product photography result
  3. 03

    No backdrop picker, one fixed square output

    There is no backdrop color picker, camera or lighting selector. Each run makes one square image for 45 credits, shown on the Generate button, so remove cables, boxes and props that are not part of the product before you upload.

    • One image per run
    • Avoid glare over the label
    Product Photography control panel showing the fixed settings summary
    The panel shows the fixed settings before you generate
  4. 04

    Read every mark on the label

    A word or a quantity can change while the pack still looks right, so read the brand name, product name and small marks at full size. The template does not verify product facts or marketplace image rules. Keep the real photo when exact wording matters.

    • Transparent edges should stay transparent
    • Recheck when the destination changes
    Close view of a product label in a finished studio shot
    Read every word on the label at full size

Keep exploring Potto AI

Pick the task that matches what you need next for the product image.

Product Photography FAQs

  1. What is product photography on this page?

    Product photography is photography that presents an item for sale or promotion. This page makes an AI product photo from one you already have: a studio-style version with a soft neutral backdrop, clean soft light and a subtle reflection. The output is a generated presentation, not a real studio shoot or proof of the item's exact features, so compare it with the product itself.

  2. Which product photo works best?

    Use one clear photo of the exact item that shows the complete product and a readable label. Remove cables, boxes or props that are not part of the product before shooting, and avoid glare or deep shadow over the label or a functional feature. If a detail is hidden in the source, take a second real photo of it, because the model may invent what it cannot see. JPG, PNG and WebP are accepted, up to 20 MB.

  3. Will the product label stay accurate?

    The recipe asks to retain the label, shape, and details, but accuracy is not guaranteed. Compare every word, symbol, color, and product feature with the source. If an essential label or fitting changes, do not use that result as a factual representation of the item.

  4. Should I use this or remove the background?

    Use background removal when the item should remain as an isolated source cutout. Use this template when you want to explore a new studio-style presentation and can review generated changes. A specific scene or local correction belongs in a custom editor request rather than a hidden setting in this preset.

  5. Can I publish it in a product listing?

    Use a result only after checking that it accurately represents the actual item and meets the destination’s current requirements. This page does not validate marketplace rules or guarantee listing approval. Keep verified product photographs and information available when making that decision.

  6. Can I pick the backdrop or put the product in a scene?

    Not on this page; it always uses the same neutral studio backdrop. To keep the original product and drop its background, use Background Remover; to place the cut-out product on a color or your own image, use Background Changer; to describe a scene in words, use the AI image editor.

  7. What does a studio product photo cost, and what file do I get?

    45 credits per run for one 1:1 PNG at HD, made with Nano Banana Pro. The amount appears on the Generate button before you confirm.

Potto AI

Make your studio product photo

Upload one clear product photo, review the credit estimate, and compare the studio shot with the real item before using it.